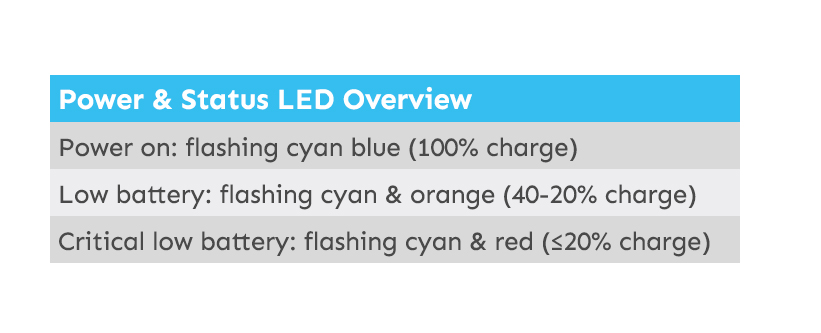
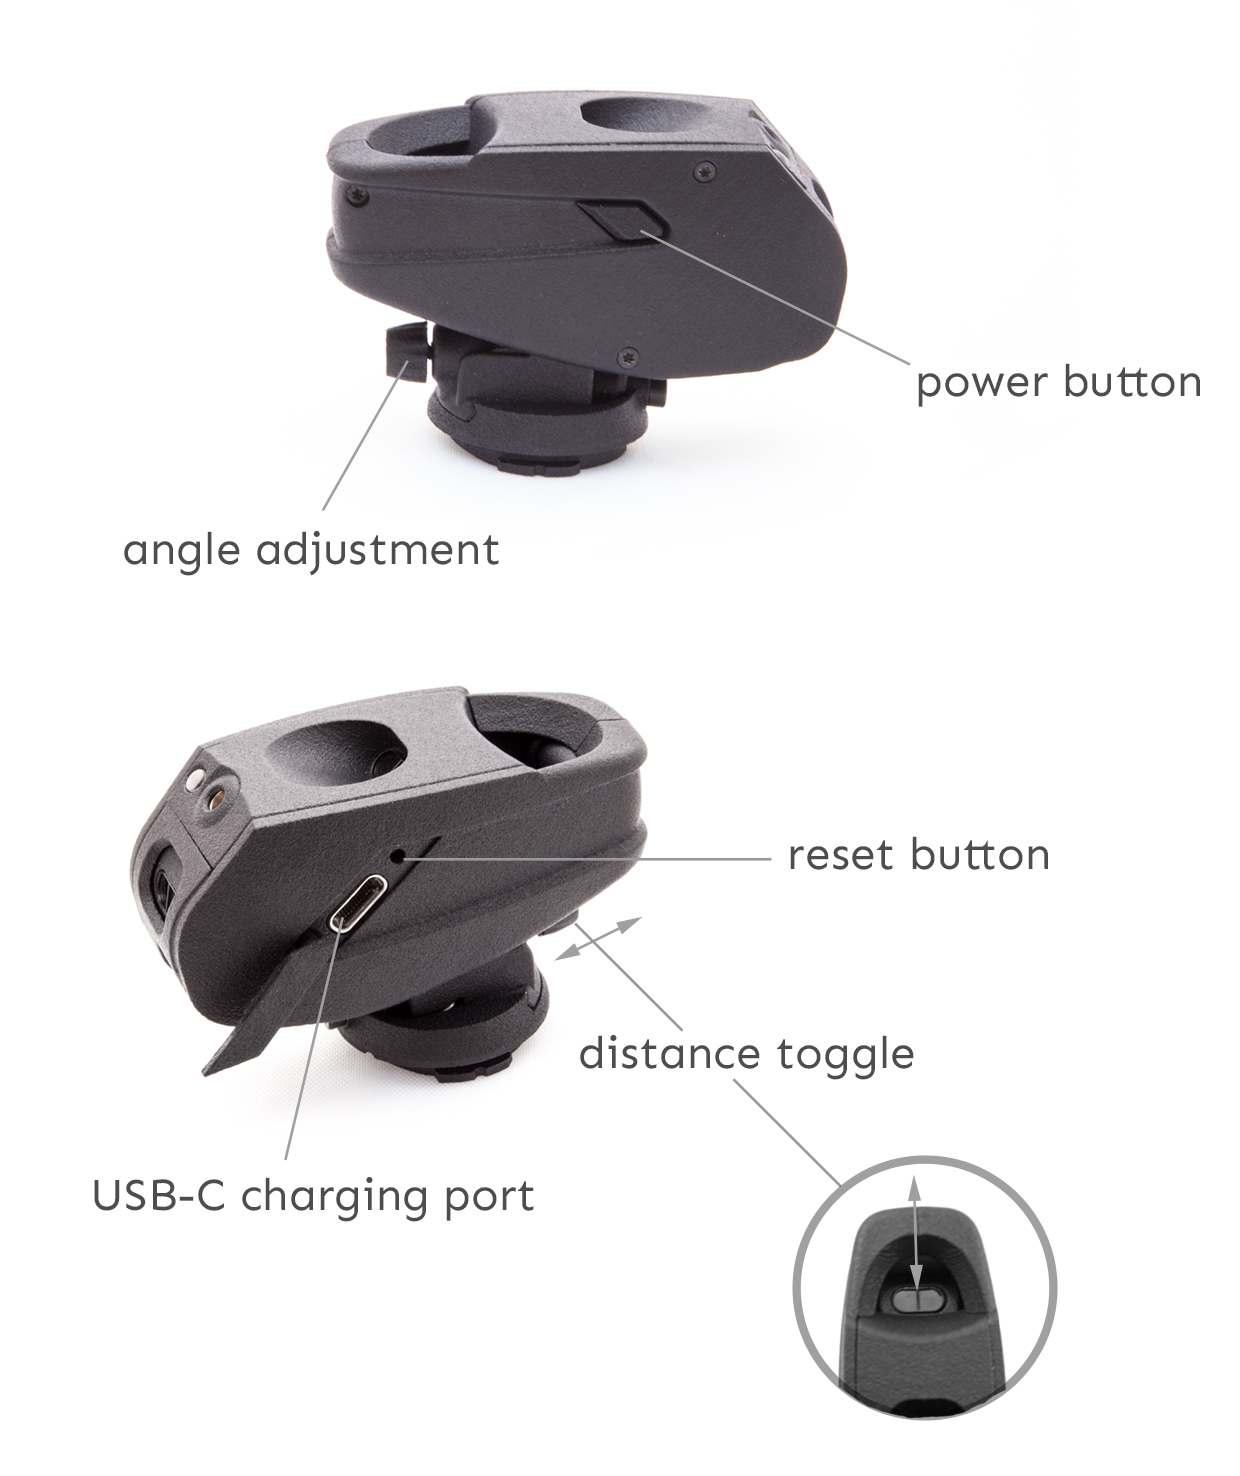
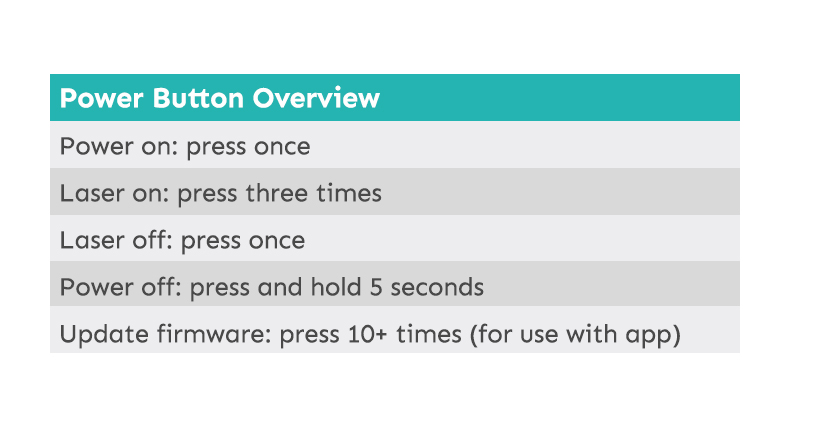
You will need a Garmin bike computer to see the FORMA data in real time. Currently, the FORMA is compatible with 530, 540, 830, 840, 1030, and 1040 models. FORMA data is also logged in the Streamlines Nimbus app, and this logging does not require a Garmin bike computer.
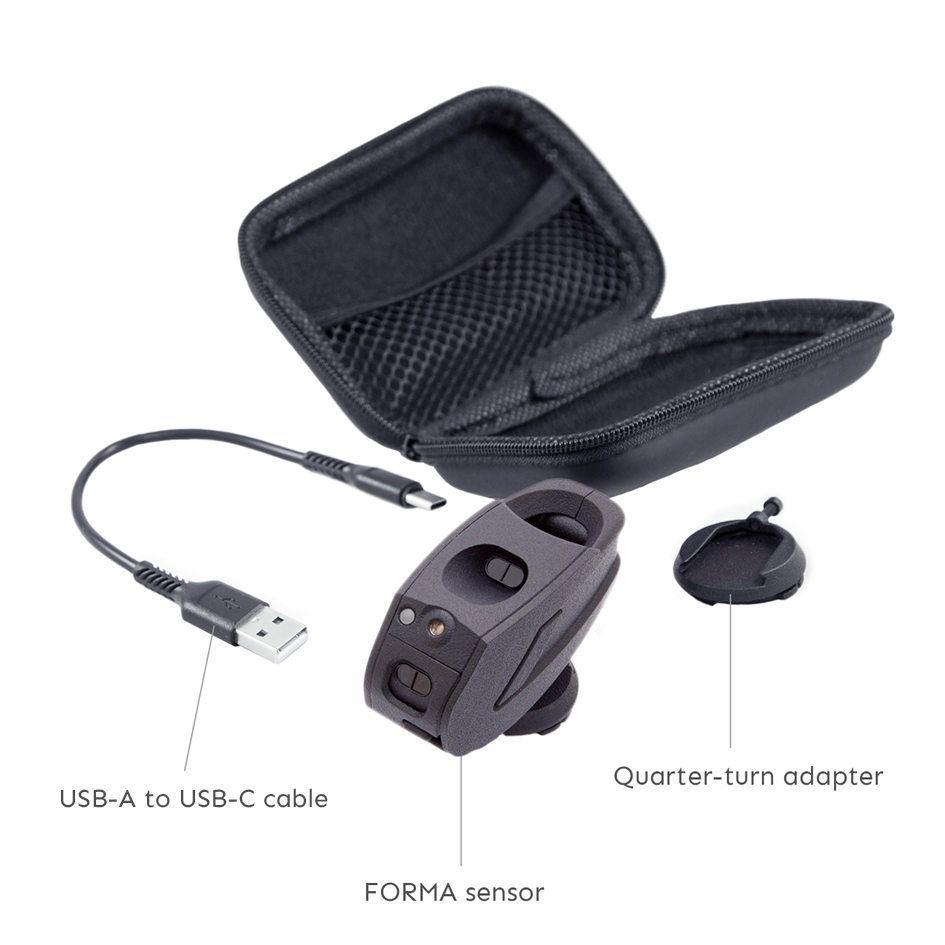
Please note the FORMA requires a USB-A to USB-C cable to charge. It will not charge when using a USB-C to USB-C cable. This only applies to the FORMA sensor, and not to other Streamlines devices.
ALIGNMENT
FORMA CIQ
FORMA DF
To use your FORMA sensor with a Garmin bike computer, we recommend installing both the FORMA CIQ app for the initial setup and the FORMA DF datafield for use while cycling. Both are available on the Garmin ConnectIQ store.
The FORMA CIQ app provides a simple environment for the setting of the target position while the FORMA DF allows body positioning data to be easily displayed within a user’s existing activity screens.
Our recommended path for the installation of the Garmin-FORMA software is through the use of both ConnectIQ and Connect mobile apps. ConnectIQ downloads the FORMA software onto the mobile and Connect installs the FORMA software onto the bike computer.
For further information on ConnectIQ Apps and Data Fields, please see - Understanding the differences between Garmin Apps and Data Fields.
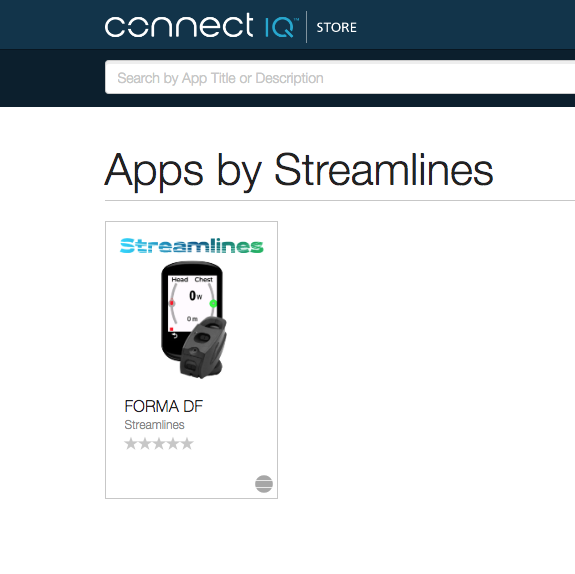

When a FORMA DF data field is added to an activity, the body position data will be automatically recorded within the FIT file and displayable within Garmin Connect.
A Garmin Connect IQ app creates a separate activity environment outside of the user's existing activity environments, such as Road or Indoor. In contrast, a Garmin Connect IQ Data Field allows additional data to be displayed within an existing activity environment, such as Road or Indoor.
The only information shared between FORMA CIQ and FORMA DF is the target position, as this is stored on the FORMA device. All other connections and display information are not shared.
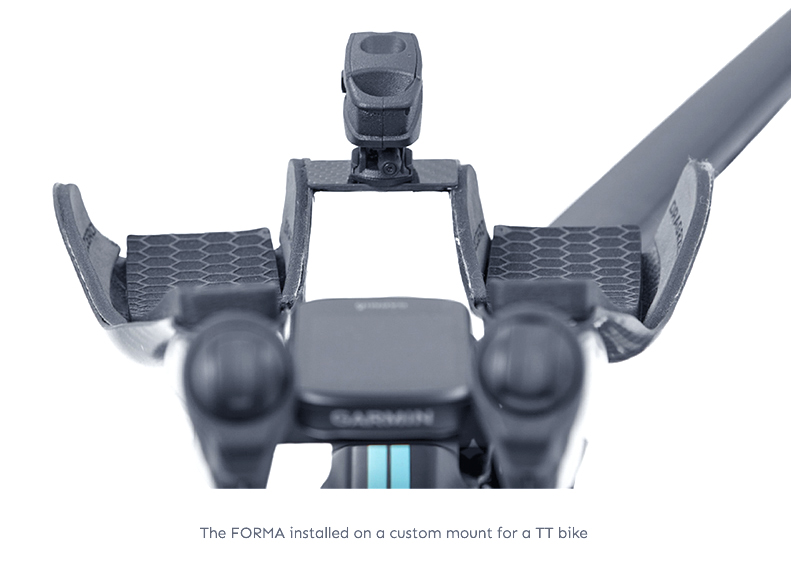
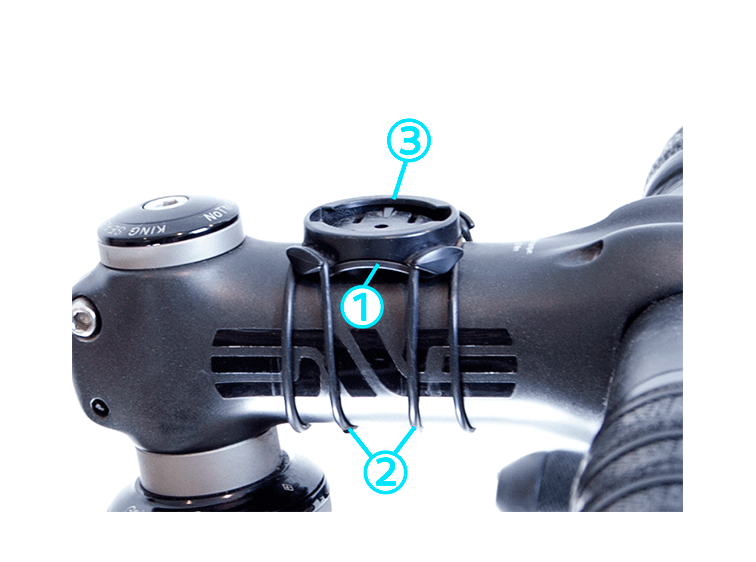
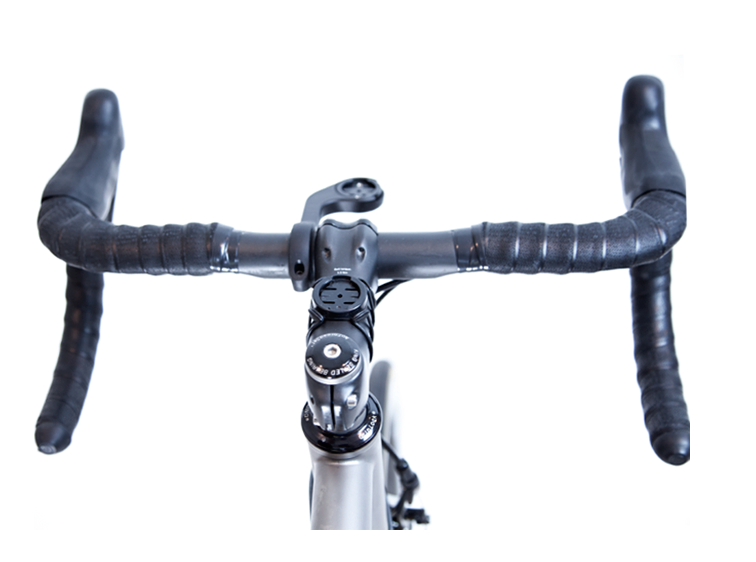
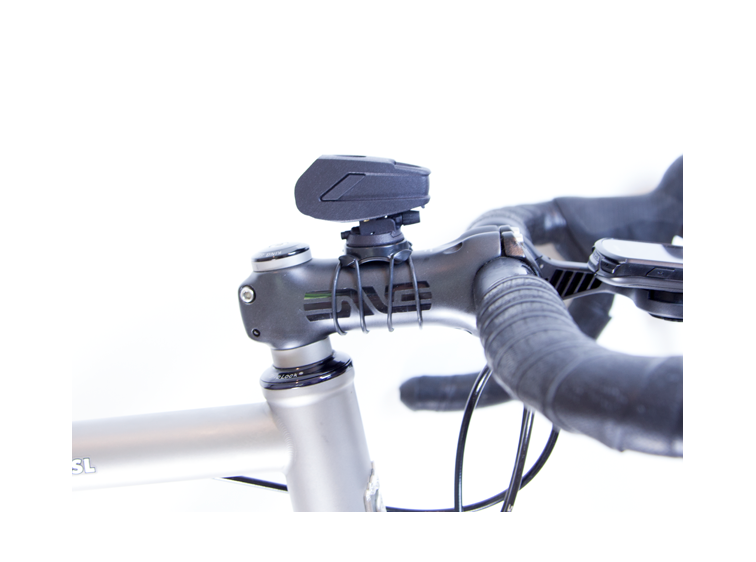
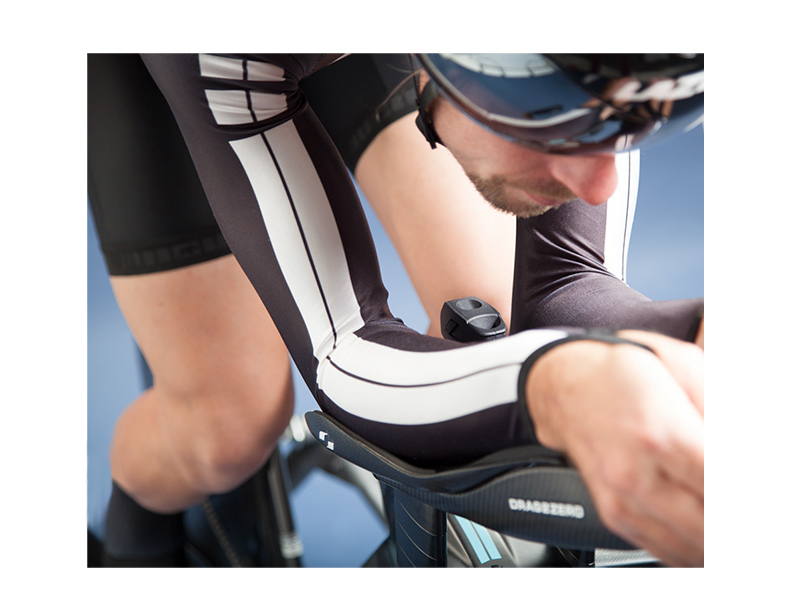
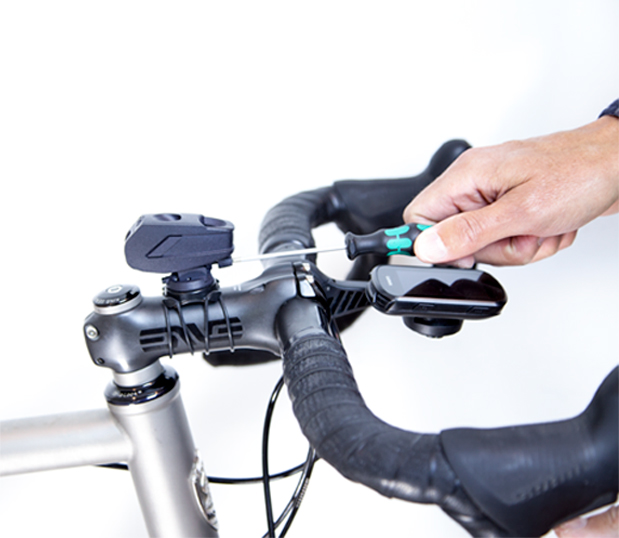
For the best FORMA performance, position the bike mount midway along the stem. You can install a standard Garmin ¾ turn mount on the stem, or the handlebars, or a custom mount when using aero extensions. For assistance with custom mounts please send a message to support@streamlines.aero
On stem, using Garmin 1/4 turn mount system
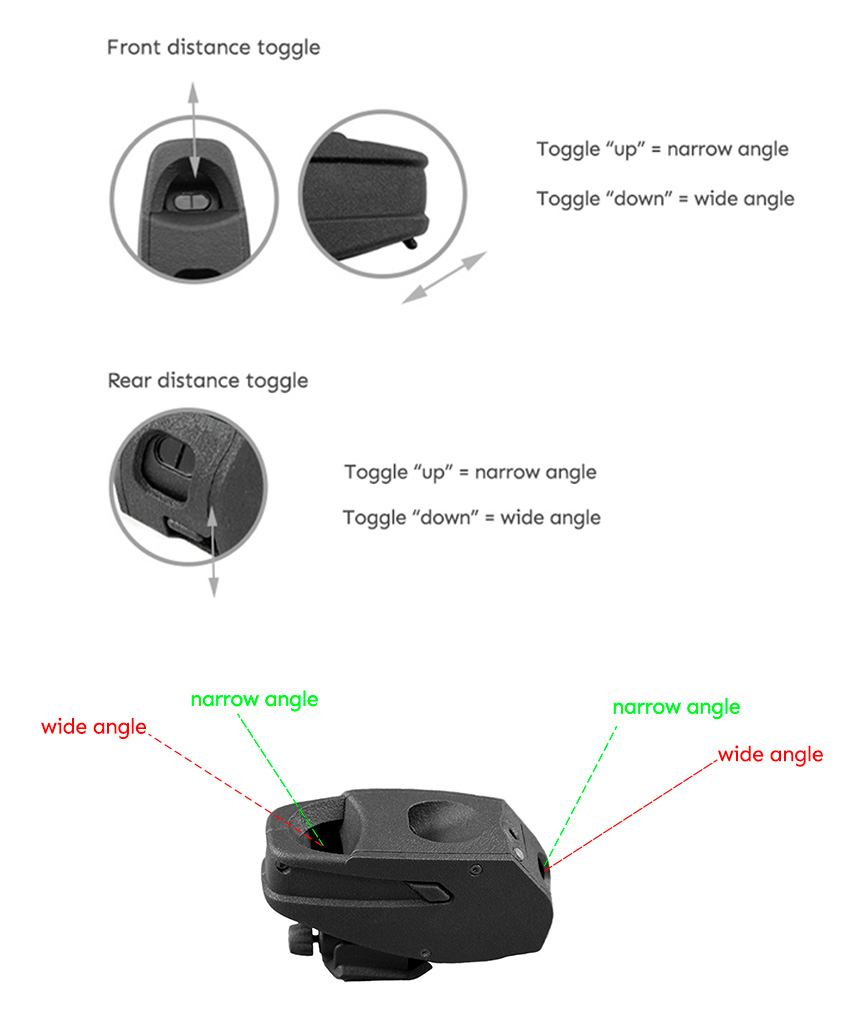
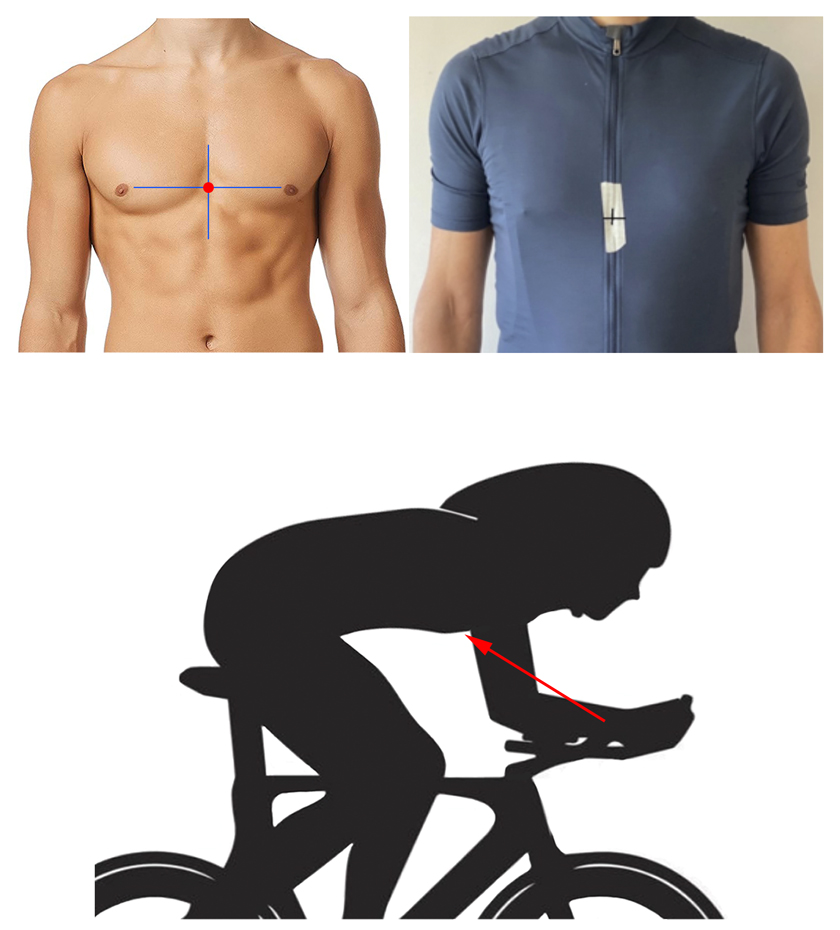
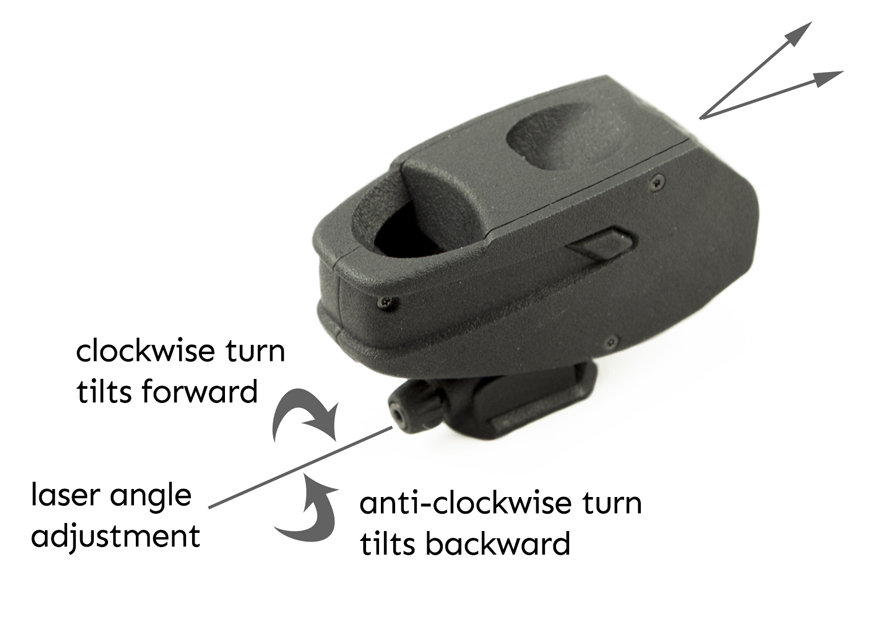
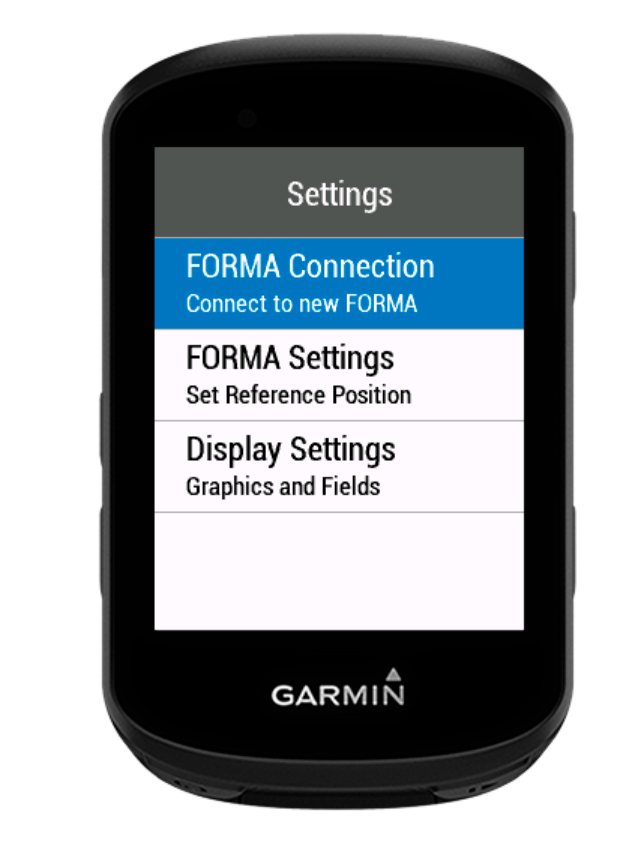
With the FORMA sensor now connected, navigate to Main Menu > FORMA Settings > Set Reference Position.
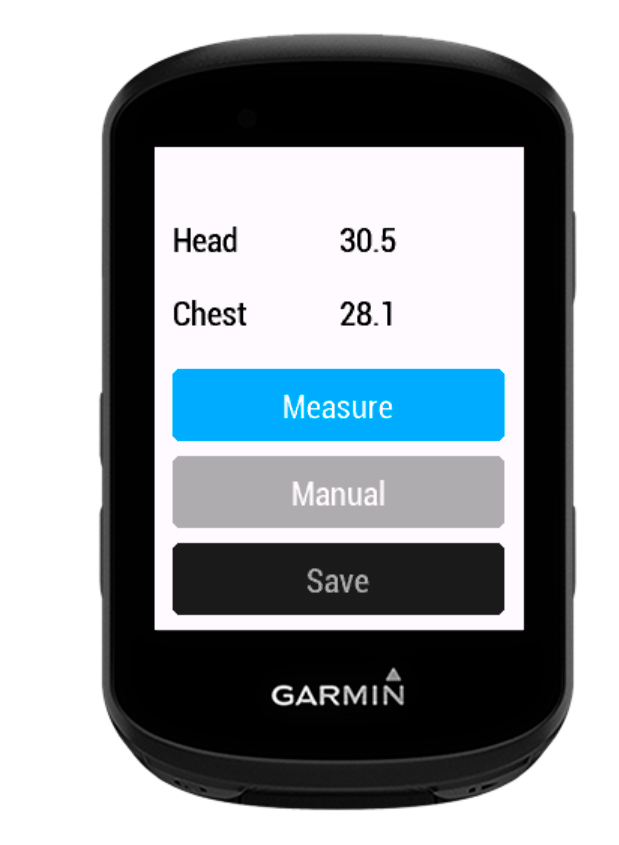
You can set a reference body position by A) measuring and recording new values or, B) using known values from a previous test:
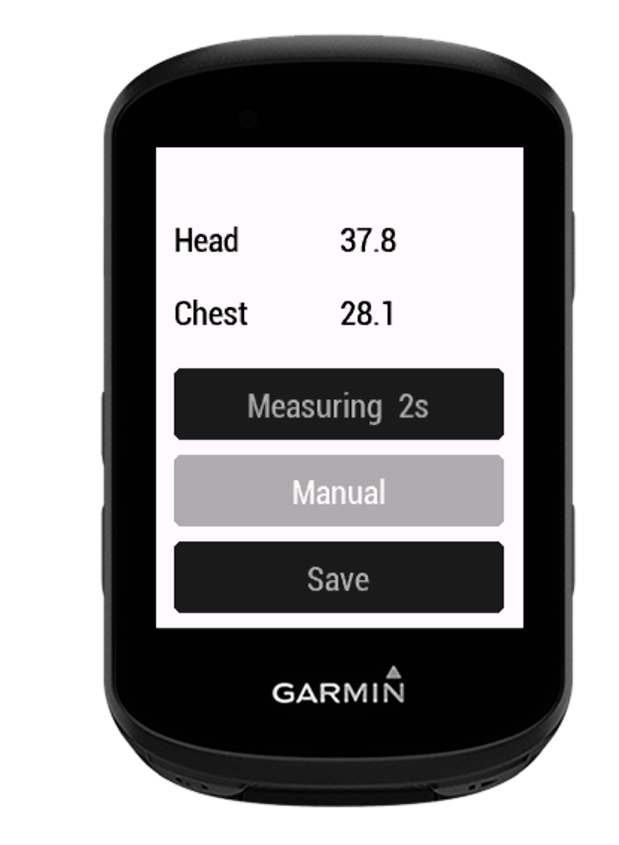
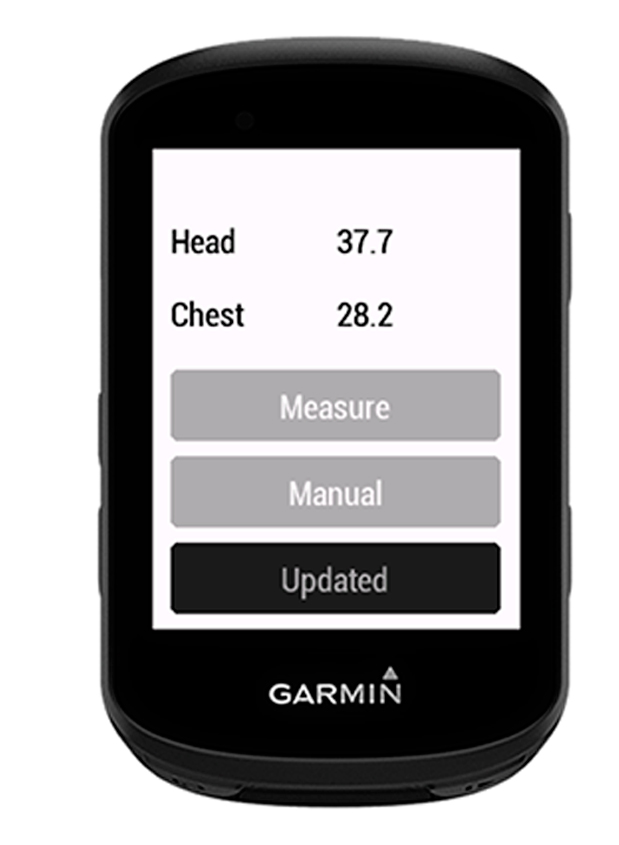
A) Measured Values - To measure and record body position place bike on a stationary trainer (or have someone hold the bike) where the rider can maintain their correct body position. Body position measurements can be recorded by pressing the 'Measure' button and holding the desired position for 5 seconds. Loose fitting clothes can interfere with measurements and give inconsistent results. It is best to wear tight-fitting garments for this step. If you are happy with the measurements press 'Save' to record them, otherwise re-measure.
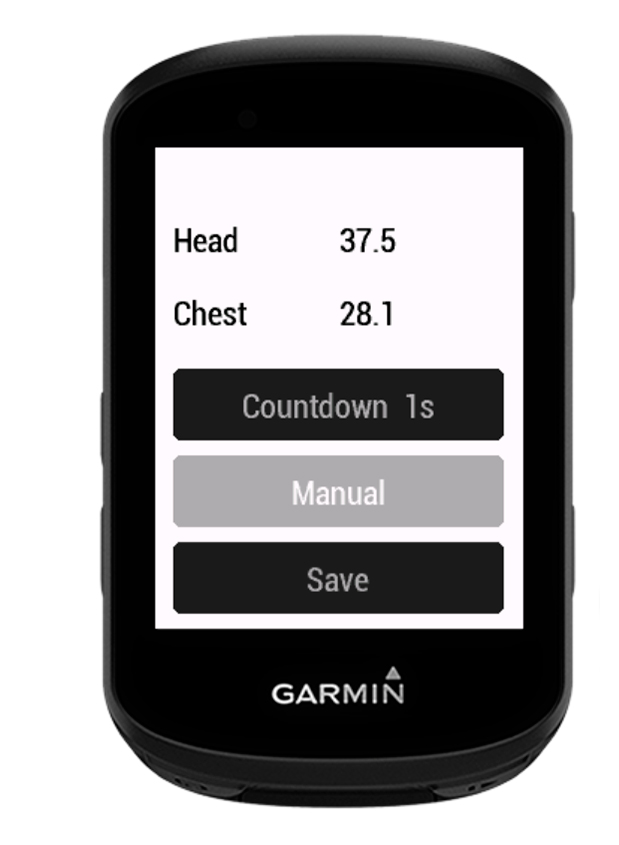
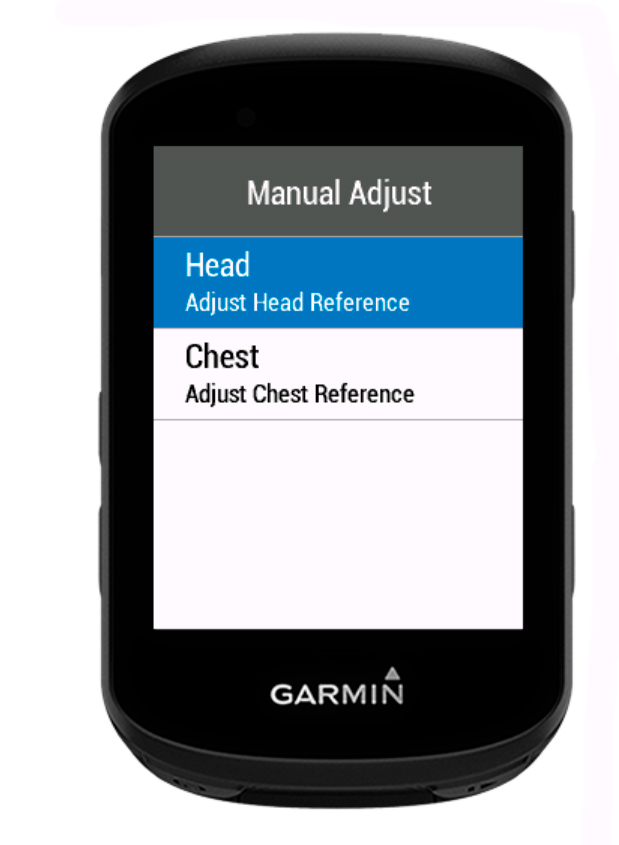
B) Known Values - Body position measurements can be entered manually by using the +/- buttons.
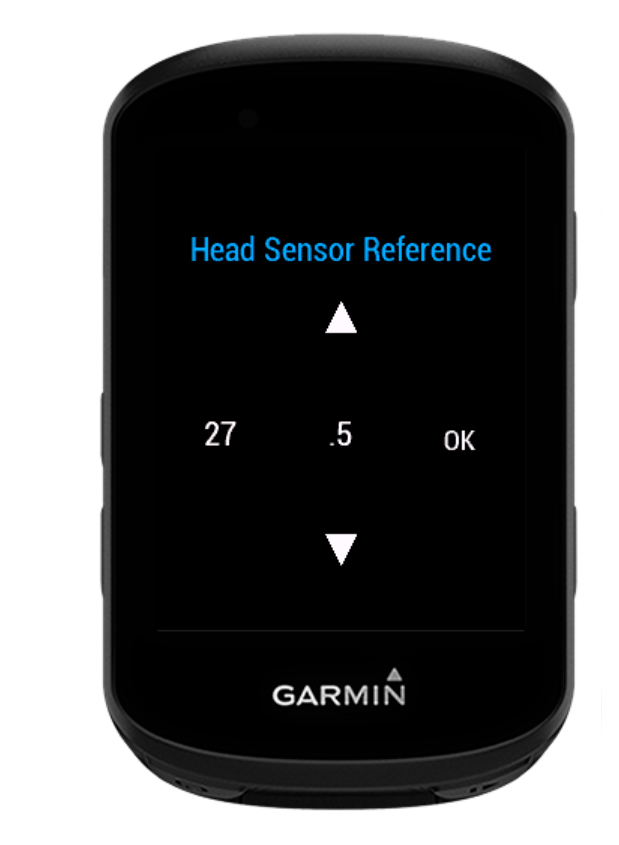
After setting the Reference Head and Chest Positions, press 'Save' to record the values.
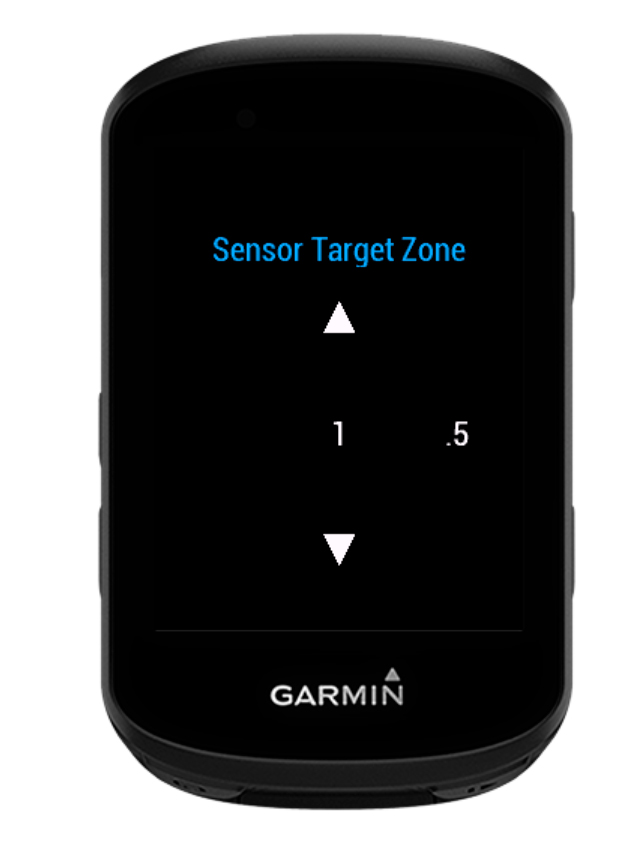
The tolerance band around the reference position is called 'target zone'. The smaller the target zone, the stricter the position feedback will be.
The default value is +/-1.5cm, but it can be manually adjusted to your personal preference. Go to Activity Profiles > Road > Data Screens > Screen 1 > Connect IQ Data Fields > FORMA DF > Display Settings > Graphics > Target Zone. Input desired values and press 'Save'.
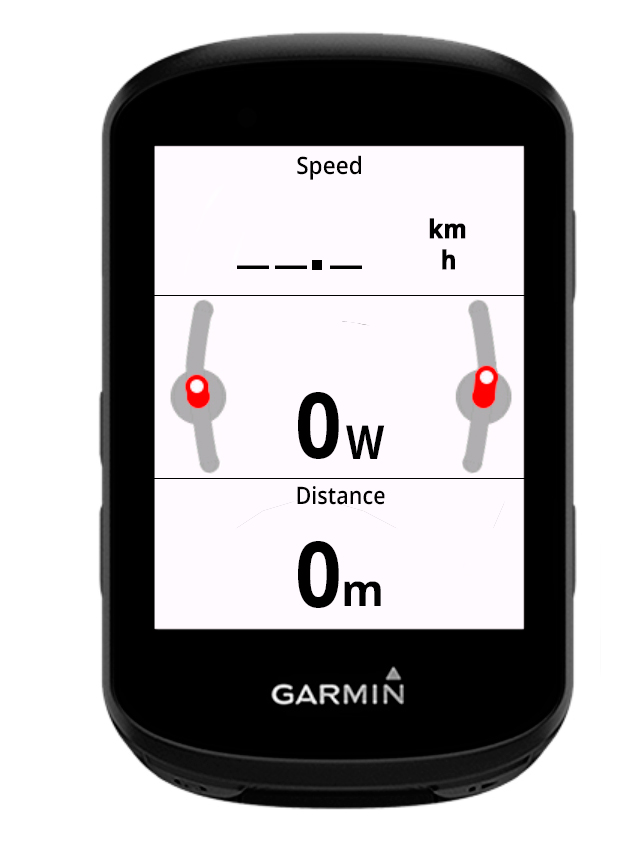
The FORMA DF data field shows body position data in visual format via the two arcs and moving white dots. The right arc corresponds to Chest and the left corresponds to Head data (these are displayed for 30 seconds when you enter the screen).
Red means Head and/or Chest are above the target zone. Blue means Head and/or Chest are bellow target zone. Green means Head and/or Chest are within target zone.
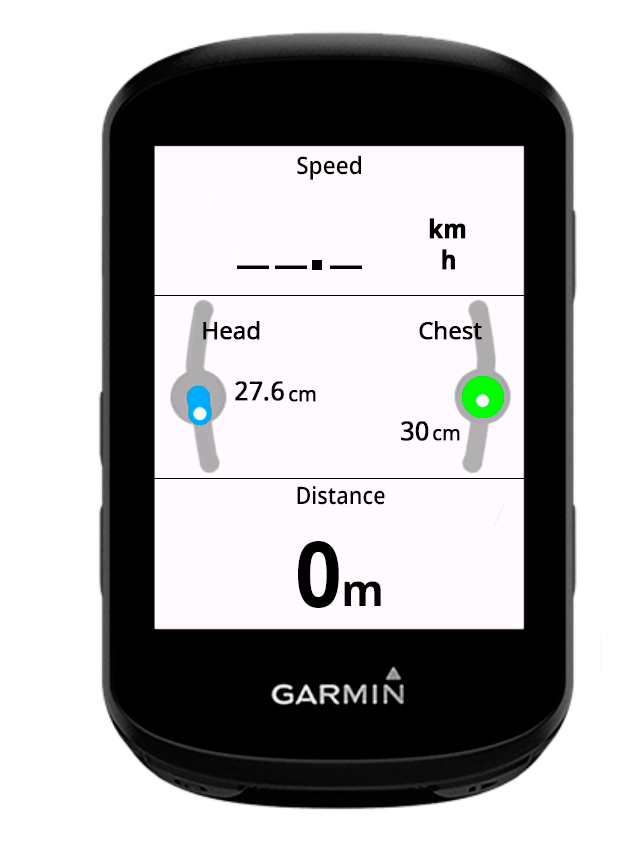
The target zone is displayed in +/- cm, and is determined by the target zone measurements. Instructions on adjusting this value are outlined on page 17. Under the Display Graphics menu you can hide the target zone measurements and display rider power instead.

You are now ready to ride with your FORMA sensor. Please read the 'Important Safety and Product Information' section (page 21-24) before proceeding.
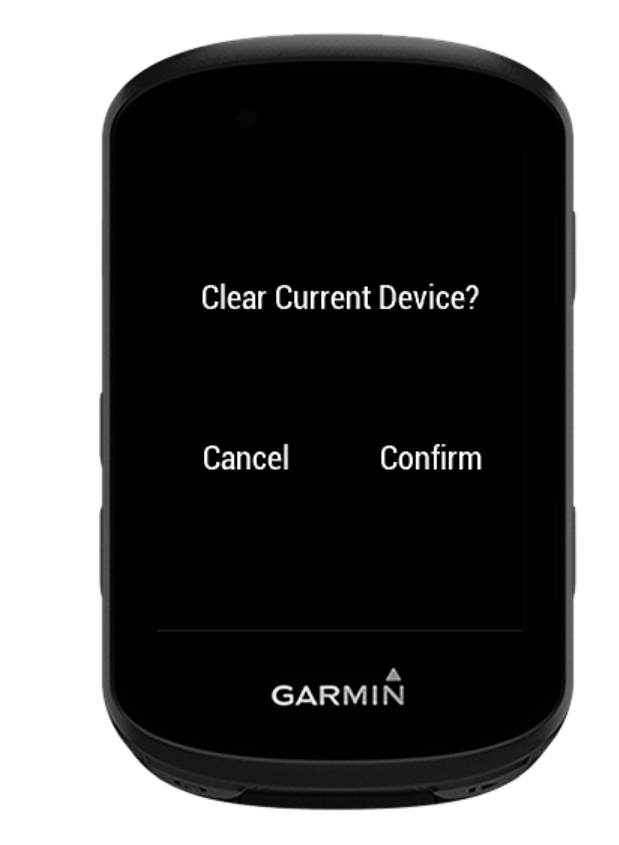
To connect a different FORMA device to the one previously connected you must first clear the existing connection.
Go to FORMA DF Settings > Connect IQ > Edit DF Settings? (yes) > FORMA Connection > Clear Current Device? (yes).
Now you can follow the on-screen instructions to connect a different device.
Body position data is stored in the FORMA unit. If connecting to another Garmin device these will be carried over. However, settings such as Target Zone size and other graphic options are stored on the Garmin device itself and therefore will not be carried over.
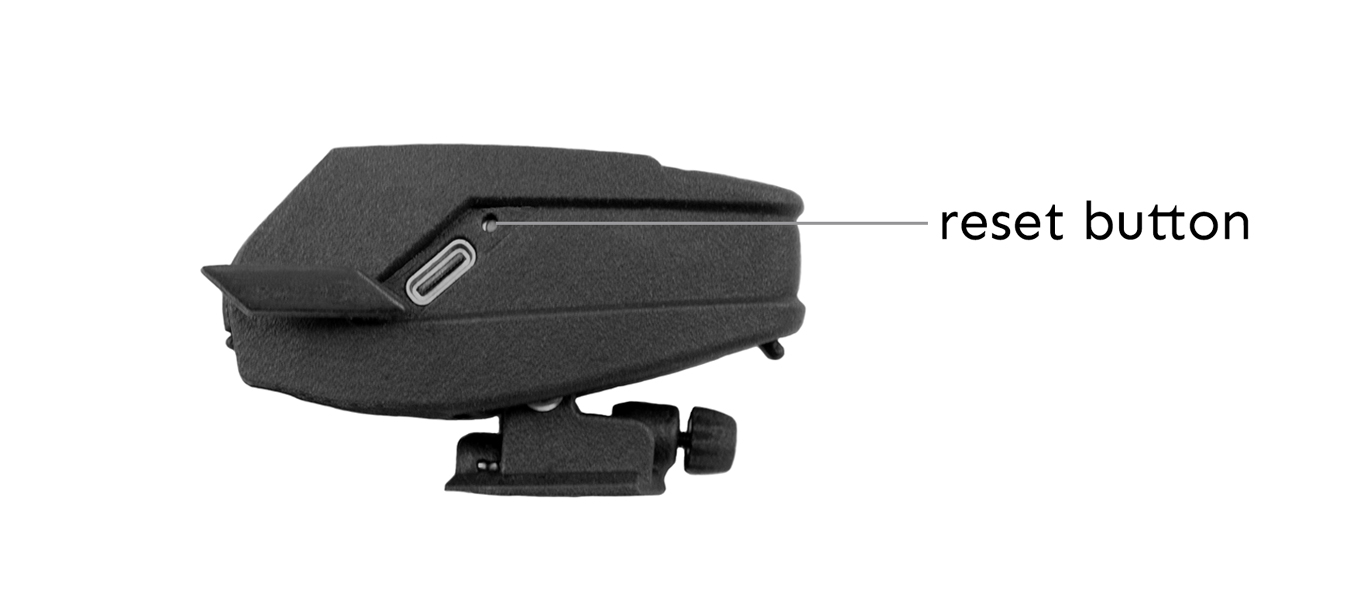
If the FORMA device becomes unresponsive you can manually reset it by inserting a pin into the hole above the charging port and pressing it down for 3 seconds. This reset only cuts off the power and will not erase any stored data.
Please periodically check if your FORMA sensor is running the latest software version by downloading the Streamlines Firmware Updater App (available at the iOS App Store and Google Play Store) and updating it when appropriate.
How to use the Firmware Updater App:
The Garmin Connect software should update automatically.
However, if the Garmin app has not updated, check the ConnectIQ mobile app to see if there is an update queued. Garmin hardware sometimes needs a restart to load a new version.
 BICYCLE WARNINGS:
 WARNING:
Failure to follow there safety and product instructions
could result in damage to the FORMA device. Please read all the information below before using your FORMA.
 KEEP BATTERIES AWAY FROM CHILDREN.
 NEVER PUT BATTERIES IN MOUTH.
Laser Safety Information.
Output Power < 1mW
Output Mode - CW
Wavelength -
BS EN 60825-1:2014:+A11:2021.
The FORMA device uses a class 2 laser. Class 2 lasers are considered safe for normal operation. Class 2 lasers are relatively weak and would not harm an eye unless a person deliberately stared into the beam. Protective eyewear is not normally necessary. However, a Class 2 laser can be a distraction, glare, or flash blindness hazard for pilots and drivers. NEVER AIM ANY LASER TOWARDS AN AIRCRAFT OR VEHICLE THAT IS IN MOTION. ONLY ALLOW USE BY RESPONSIBLE PERSONS.
Exposure to Radio Frequency. This device is a portable transmitter and receiver that uses an internal antenna to send and receive low levels of radio frequency (RF) energy for data communications. The FORMA device has been tested and emits RF energy below the applicable limits for portable radio frequency (RF) exposure use when operating in its maximum output mode. To comply with RF exposure limit requirements, the device should be used as described in this guide. The FORMA should not be modified or used in other configurations.
FCC Compliance. This device complies with part 15 of the FCC Rules. Operation is subject to the following two conditions: 1) this device may not cause harmful interference, and 2) this device must accept any interference received, including interference that may cause undesired operation. This equipment has been tested and found to comply with the limits for a Class B digital device, pursuant to part 15 of the FCC Rules. These limits are designed to provide reasonable protection against harmful interference in a residential installation. This equipment generates, uses, and can radiate radio frequency energy and may cause harmful interference to radio communications if not installed and used in accordance with the instructions. However, there is no guarantee that interference will not occur in a particular installation. If this equipment does cause harmful interference to radio or television reception, which can be determined by turning the equipment off and on, the user is encouraged to try to correct the interference by one of the following measures:
 WARNING:
THIS PRODUCT DOES NOT CONTAIN ANY USER-SERVICEABLE PARTS.
REPAIRS SHOULD ONLY BE MADE BY STREAMLINES AERO LTD. UNAUTHORIZED REPAIRS OR MODIFICATIONS COULD RESULT IN PERMANENT
DAMAGE TO THE DEVICE, AND WILL VOID YOUR WARRANTY AND YOUR AUTHORITY TO OPERATE THE EQUIPMENT UNDER PART 15 OF THE FCC
REGULATIONS.
WARNING:
THIS PRODUCT DOES NOT CONTAIN ANY USER-SERVICEABLE PARTS.
REPAIRS SHOULD ONLY BE MADE BY STREAMLINES AERO LTD. UNAUTHORIZED REPAIRS OR MODIFICATIONS COULD RESULT IN PERMANENT
DAMAGE TO THE DEVICE, AND WILL VOID YOUR WARRANTY AND YOUR AUTHORITY TO OPERATE THE EQUIPMENT UNDER PART 15 OF THE FCC
REGULATIONS.UK Declaration of Conformity. Hereby, Streamlines declares that this product is in compliance with the relevant statutory requirements. The full text of the declaration of conformity is available at the following internet address: streamlines.aero/declaration-of-conformity.
EU Declaration of Conformity. Hereby, Streamlines declares that this product is in compliance with the Directive 2014/53/EU. The full text of the EU declaration of conformity is available at the following internet address: streamlines.aero/declaration-of-conformity.
ISED Canada Compliance Statement. This device contains licence-exempt transmitter(s)/receiver(s) that comply with Innovation, Science, and Economic Development Canada's licence-exempt RSS(s). Operation is subject to the following two conditiions: (1)this device may not cause interference, and (2) this device must accept any interference, including interference that may cause undesired operation of the device.
Software License Agreement. BY USING THE DEVICE, YOU AGREE TO BE BOUND BY THE TERMS AND CONDITIONS OF THE FOLLOWING SOFTWARE LICENSE AGREEMENT. PLEASE READ THIS AGREEMENT CAREFULLY. Streamlines Aero Ltd. ("Streamlines") grant you a limited license to use the software embedded in this device (the "Software") in binary executable form in the normal operation of the product. Title, ownership rights, and intellectual property rights in and to the Software remain in Streamlines and/or its third-party providers. You acknowledge that the structure, organisation, and code of the Software is the property of Streamlines and/or its third-party providers and is protected under the UK, EU, and USA copyright laws and international copyright treaties. You further acknowledge that the structure, organisation, and code of the Software, for which source code is not provided, are valuable trade secrets of Streamlines and/or its third-party providers and that the Software in source code form remains a valuable trade secret of Streamlines and/or its third-party providers. You agree not to decompile, disassemble, modify, reverse assemble, reverse engineer, or reduce to human-readable form the Software or any part thereof or create any derivative works based on the Software. You agree not to export or re-export the Software to any country in violation of the export control laws of the UK of the export control laws of any other applicable country.

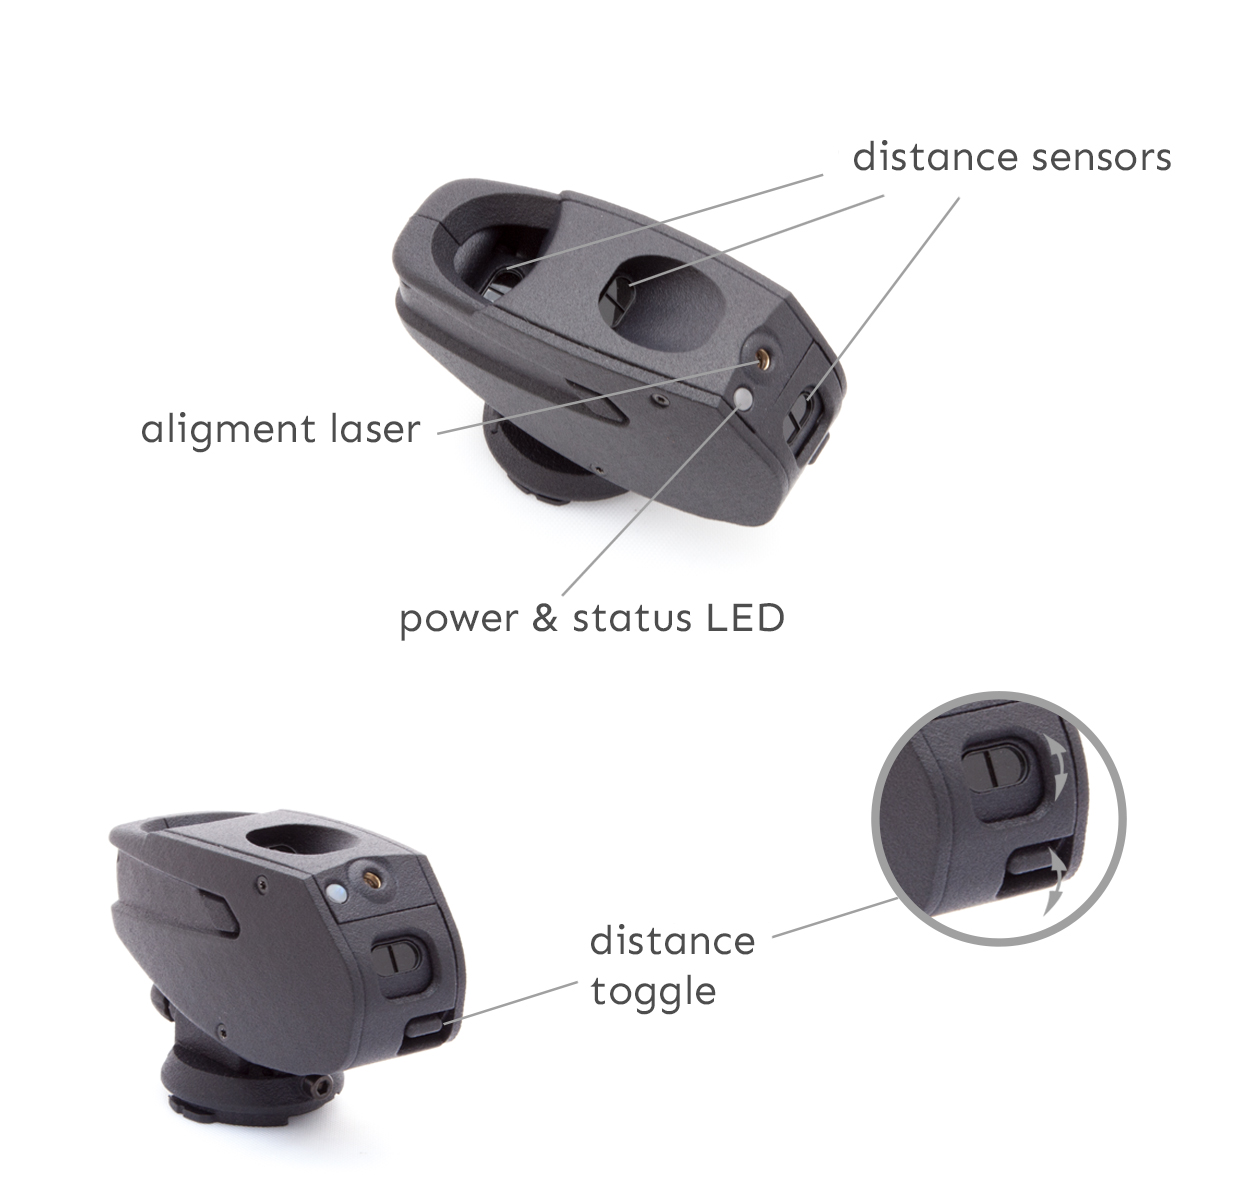
Cleaning & Care. We recommend you wipe your FORMA sensor clean with a non-abrasive, lint-free cloth. If necessary, lightly dampen the cloth with fresh water. Use the inlcuded lens wipes to wipe clean the three distance sensor lens. Ensure there is no visible debris on the lenses before applying light pressure with the wipe.
Streamlines One-Year Limited Warranty. Streamlines warrants the FORMA device and accessories against defects in materials and workmanship for one year from the date of original purchase. Streamlines does not warrant against normal wear and tear, nor damage caused by accident or abuse. To obtain service, email Streamlines at support@streamlines.aero. Service options may be limited to the country of manufacture. International shipping charges may apply, depending on the location.

Disposal and Recycling Information. The symbol above means that according to local laws and regulations your product and/or its battery shall be disposed of separately from household waste. When this product reaches its end of life, take it to a collection point designated by local authorities. The separate collection and recycling of your product and/or its battery at the time of disposal will help conserve natural resources and ensure that it is recycled in a manner that protects human health and the environment.
STREAMLINES AERO LTD.
© 2025 Streamlines Aero Ltd. All rights reserved.
The Streamlines logo, FORMA, and the FORMA logo are trademarks of Streamlines Aero Ltd, registered in the UK, EU, and US.
Streamlines Aero Limited
62 Temple Road, OX4 2HB
Oxford - United Kingdom
streamlines.aero
The Bluetooth word mark and logos are registered trademarks owned by Bluetooth SIG, Inc. and any use of such marks by Streamlines is under license.
Other company and product names mentioned herein may be trademarks of their respective companies.
Every effort has been made to ensure that the information in this manual is accurate.